Did you know that neglecting your RV roof can lead to a world of trouble? From pesky leaks to costly repairs, a poorly sealed roof can quickly turn your dream vacation into a nightmare. So, what does it actually cost to reseal an RV roof? Let’s dive in and find out.
Regular roof maintenance is key. Ignoring this crucial aspect can result in water damage, mold growth, and even structural issues. But fear not!
By understanding the factors contributing to the cost of resealing an RV roof, you can make informed decisions.
Affiliate links are used in this post at no extra cost to you. As an Amazon Associate I earn from qualifying purchases. See my Disclosure and Privacy Policy for more info.
Factors such as the size of your rig, type of sealant needed, and labor involved all influence the final price tag. While some adventurous souls may opt for DIY solutions, investing in professional resealing services offers numerous benefits.
Not only do experts ensure quality workmanship but they also save you time and potential headaches down the road.
So buckle up and join us on this journey as we explore everything you need to know about the cost to reseal your precious RV roof.

Factors Affecting the Cost of RV Roof Resealing
When it comes to avoiding an RV roof replacement, the first step is to understand all the roof repairs and extra cost possibilities that can cause an RV roof coating experience to be higher than expected.
Size and Type of RV
The size and type of your RV play a significant role in determining the cost of resealing its roof. Larger RVs require more materials and labor, resulting in higher costs.
Different types of RVs may have specific roofing materials that vary in price.
For example, fiberglass roofs are generally more expensive to reseal compared to rubber or aluminum roofs. The larger the RV and the more specialized the roofing material, the greater the overall expense.
Condition of the Existing Roof and Extent of Repairs Needed
The condition of your existing roof is another crucial factor influencing the cost of resealing. If your roof has extensive damage or leaks, it will require additional repairs before resealing can take place.
These repairs can include fixing cracks, replacing damaged sections, or reinforcing weak areas. The extent of these repairs directly impacts both labor time and material costs, resulting in a higher overall price for resealing.
Accessibility and Complexity of the Roof Structure
The accessibility and complexity of your RV’s roof structure also affect the cost of resealing. Some roofs may be easier to access than others due to their design or location on the vehicle.
If your roof is challenging to reach or requires dismantling certain components for access, it will likely increase labor time and subsequently raise the cost.
Similarly, if your roof has intricate features such as vents, skylights, or antennas that need extra attention during resealing, it can contribute to additional expenses.
Additional Services
In addition to resealing alone, there are several other services that may impact the overall cost. These services include cleaning, priming, or coating your RV’s roof surface before applying sealant.
Cleaning ensures proper adhesion while priming prepares the surface for sealing by creating an optimal base layer. Coating provides an extra layer of protection against the elements.
While these services are not always necessary, they can enhance the longevity and effectiveness of your RV roof resealing. However, keep in mind that each additional service will incur an additional cost.
Thinking about trying out camping? Find out how to rent an RV easily here!
Considering these factors is essential when estimating the cost to reseal your RV roof. The size and type of your vehicle, the condition of the existing roof, accessibility and complexity of the roof structure, as well as any additional services required all contribute to the final price.
By understanding these factors, you can make informed decisions about budgeting for this maintenance task and ensuring the longevity and durability of your RV’s roof.
So, whether you own a compact camper or a spacious motorhome, take into account factors like size, material type, temperature fluctuations, and accessibility before diving into a project to reseal your RV’s roof.
Comparing the Costs of DIY vs. Hiring a Professional for RV Roof Resealing
Pros and Cons of DIY Resealing
You have two options: tackle the job yourself or hire a professional. Let’s explore the pros and cons of each approach in terms of cost savings and quality control.
DIY repairs can be an attractive option for those looking to save some money. By taking on the project yourself, you can avoid labor costs associated with hiring a professional. Doing it yourself allows you to work at your own pace and have complete control over the process.
However, there are potential risks involved with improper installation during DIY projects. Without prior experience or proper guidance, you may make mistakes that could lead to leaks or further damage down the line.
It’s important to consider whether you have the necessary skills and knowledge before attempting a DIY reseal.
Advantages Offered by Professional Services
On the other hand, hiring a professional for your RV roof resealing comes with several advantages. Professionals bring their expertise and experience to the job, ensuring that it is done correctly and efficiently.
They have likely worked on numerous similar projects before, which means they know how to handle different types of roofs effectively.
Another advantage is the warranty provided by professional services. If any issues arise after the job is completed, you can rely on their warranty to cover any necessary repairs or adjustments. This peace of mind is invaluable.
Hiring professionals saves you time and effort.
Instead of spending hours or even days working on the project yourself, you can simply hand over the task to capable individuals who will get it done right in a fraction of the time.
Cost Breakdown Comparison
Let’s break down the costs involved in both DIY supplies and professional service fees: (the fees are intentionally left out so use this as a guide of what to plan for, and then call and get the pricing)
- DIY Supplies:
- Resealing kit: $X
- Cleaning agents: $X
- Tools and equipment: $X
- Total DIY cost: $X
- Professional Service Fees:
- Labor costs: $X
- Materials and supplies included: $X
- Warranty coverage: Included
- Total professional cost: $X
As you can see, there is a difference in the overall cost between the two options. While DIY may seem cheaper at first glance, it’s important to consider the value of professional expertise, warranty coverage, and time saved.
If you want to cut down on total cast, it might be a good idea to repair your camper’s roof on your own – but be careful and make sure this is the best choice.
You’ll want to be sure that you do a great job so that the most important thing is protected fully, which is your roof.
If you have a professional seal the roof, the actual cost does go up, but you will also potentially have a great warranty and have peace of mind knowing that as you extent your RV life.
Determining if Your RV Roof Needs Resealing or Coating
One crucial aspect is the condition of its roof. Over time, exposure to various weather conditions can cause wear and tear, potentially leading to water damage and costly repairs. To avoid this, it’s essential to determine whether your RV roof needs resealing or coating.
Let’s explore some signs indicating the need for each option and factors to consider when making a decision.
Signs indicating a need for resealing versus applying a protective coating
If you notice any of the following signs on your RV roof, it may be time for resealing:
- Cracks and Leaks: Inspect your roof carefully for cracks or areas where water might seep through. If you find any leaks inside your RV after rainfall, it’s a clear indication that resealing is necessary.
- Worn-out Roof Material: Over time, the roof material can deteriorate due to exposure to UV rays and other elements. Check for signs of discoloration, peeling, or brittleness in the roofing material.
- Visible Water Damage: Look out for stains or watermarks on the ceiling inside your RV. These are often caused by leaks from an inadequately sealed roof.
On the other hand, applying a protective coating may be more suitable if:
- Your Roof is New: If you have recently installed a new roof on your RV, applying a protective coating can help extend its lifespan by providing an additional layer of defense against weather elements.
- You Want Preventive Measures: Coatings act as a proactive approach to protect your roof from potential damage before any issues arise.
- Minor Cracks or Wear: If there are only minor cracks or signs of wear on specific areas of your roof, applying a coating can provide adequate protection without requiring extensive resealing.
Factors to consider when deciding between resealing or coating options
When deciding between resealing and applying a protective coating, several factors come into play:
- Budget: Consider the cost of materials and labor involved in both options. Resealing may require more extensive work and higher expenses compared to applying a coating.
- Longevity: Evaluate the expected lifespan of each option. While resealing provides a more thorough solution, coatings can offer substantial protection for several years.
- Maintenance Effort: Determine how much effort you are willing to put into maintaining your RV roof. Resealed roofs may require periodic inspections and touch-ups, while coated roofs generally demand less maintenance.
- Weather Conditions: Assess the climate conditions your RV will encounter most frequently. If you often travel through regions with extreme temperatures or heavy rainfall, a more durable solution like resealing might be necessary.
Exploring Different Types of RV Roof Sealants and Their Costs
EPDM, TPO, silicone-based, and acrylic-based sealants are among the most popular options. Each type has its own advantages and disadvantages, along with varying costs.
Let’s dive into a comparative analysis of these sealants, highlighting their pros and cons as well as average prices.
EPDM (ethylene propylene diene monomer) sealants
When considering EPDM (ethylene propylene diene monomer) sealants, durability and cost-effectiveness are key factors. EPDM is known for its resistance to UV rays, ozone, and extreme weather conditions.
This type of sealant provides excellent protection against leaks and can last up to 20 years with proper maintenance. The material costs for EPDM range from $0.40 to $0.80 per square foot on average.
Check PriceCheck PriceCheck PriceCheck Price
TPO (thermoplastic olefin) sealants
On the other hand, TPO (thermoplastic olefin) sealants offer superior energy efficiency due to their reflective properties. They help keep the interior cool during hot summers by reducing heat absorption.
TPO is also resistant to mold growth and punctures, making it a reliable choice for many RV owners. The material costs for TPO typically range from $0.50 to $1 per square foot.
Check PriceCheck PriceCheck PriceCheck Price
Silicone-based sealants
Silicone-based sealants have gained popularity in recent years due to their exceptional flexibility and waterproofing capabilities. Silicone creates a strong barrier against water infiltration while allowing the roof membrane to expand or contract with temperature changes without cracking or peeling off.
However, silicone tends to be more expensive than other types of sealants, with material costs ranging from $1 to $2 per square foot.
Check PriceCheck PriceCheck PriceCheck Price
acrylic-based sealants
For those looking for a more affordable option without compromising quality too much, acrylic-based sealants might be worth considering. Acrylic offers decent protection against leaks while being easy on the wallet.
It is important to note that acrylic may not have the same longevity as other types of sealants, with an average lifespan of about 5 to 10 years. Material costs for acrylic-based sealants usually range from $0.20 to $0.50 per square foot.
When selecting a sealant for your RV roof, it is crucial to consider the climate conditions you’ll be facing. If you frequently travel through areas with intense sunlight and high temperatures, TPO or silicone-based sealants might be more suitable due to their heat resistance properties.
On the other hand, if you often encounter heavy rain or snowfall, EPDM or acrylic-based sealants can provide effective waterproofing.
Assessing the Importance of Resealing Joints and Seams on an RV Roof
Neglecting regular maintenance on an RV roof can lead to costly repairs down the line, especially. These vulnerable areas are prone to water leaks and damage, making it essential to address them promptly.
Vulnerability of joints and seams to water leaks and damage
RV roofs consist of various materials that are joined together at seams and edges. Over time, exposure to harsh weather conditions can cause these joints to deteriorate, leading to potential water leaks.
When rainwater seeps into the interior of an RV through compromised joints or seams, it can result in extensive damage, such as rotting wood, mold growth, or even structural issues.
To prevent such problems, regular inspection is vital. Look out for signs of wear or gaps in the seals around vents, skylights, air conditioners, antennas, and any other protrusions on your roof.
Pay close attention to areas where different materials meet, as they tend to be more susceptible to damage.
Cost implications of neglecting joint and seam resealing
Ignoring the need for resealing joints and seams may seem like a minor issue initially but can quickly escalate into a major expense. The cost of repairing water damage inside an RV can be substantial compared to the relatively low cost of routine maintenance.
By investing in timely resealing measures using appropriate sealants or tapes designed specifically for RV roofs, you can significantly reduce the risk of leaks and subsequent repair costs.
Regularly inspecting your roof’s condition will help identify any problem areas early on before they become more significant issues.
Techniques for effective joint and seam resealing
Several techniques can ensure a watertight seal. Here are some effective options:
- Clean and prep the area: Before applying any sealant or tape, make sure the surface is clean, dry, and free from debris. Use a mild detergent or specialized RV roof cleaner to remove dirt and grime.
- Choose the right sealant: Select a high-quality sealant specifically designed for use on RV roofs. Look for products that offer UV resistance and flexibility to withstand temperature changes.
- Apply the sealant/tape: Follow the manufacturer’s instructions carefully when applying the chosen sealant or tape. Ensure complete coverage of all joints and seams, paying extra attention to areas prone to leaks.
- Inspect regularly: Regularly inspect your resealed joints and seams for signs of wear or damage. Address any issues promptly by reapplying sealant if necessary.
Check PriceCheck PriceCheck PriceCheck Price
Comparing the Cost of RV Roof Resealing vs. Replacement
One important aspect to consider is the condition of its roof. Over time, exposure to harsh weather conditions and UV rays can cause damage such as cracks, gaps, or even tears in the roof. If left unaddressed, this damage can lead to more serious issues like water leaks and rotting.
Factors influencing the decision between resealing or roof replacement
Before deciding whether to reseal or replace your RV roof, several factors should be taken into consideration. The extent of the damage, the age of your RV, and your budget are all crucial elements that will influence your decision.
If the damage is minimal and limited to a few small areas, resealing might be a viable option. However, if there are extensive cracks or significant structural issues present, a complete roof replacement may be necessary.
Comparative cost analysis highlighting pros & cons of each option
Resealing an RV roof tends to be more cost-effective compared to a full replacement. On average, the cost for resealing ranges from $300-$600 depending on various factors such as the size of your RV and labor costs in your area. This option allows you to address specific problem areas without breaking the bank.
On the other hand, a complete roof replacement can be considerably more expensive. The average cost for replacing an RV roof ranges from $2,000-$5,000 or even higher for larger rigs or specialized materials.
While this may seem like a significant investment upfront, it provides long-term benefits in terms of durability and functionality.
Long-term benefits in terms of durability, functionality, and aesthetics
Opting for a full roof replacement offers several long-term advantages over resealing. Firstly, it ensures better protection against future leaks by eliminating any underlying issues that may not be visible during resealing.
A new roof provides improved insulation, which can help regulate the temperature inside your RV and reduce energy costs.
From a functional standpoint, a replacement roof offers increased structural integrity, reducing the risk of further damage caused by heavy rain or snow.
Moreover, it enhances the overall aesthetics of your RV, giving it a fresh and updated appearance.
Expert advice on when it is more cost-effective to choose one over the other
While resealing is generally more affordable, there are instances where a complete roof replacement becomes more cost-effective in the long run. If your RV is older and has experienced multiple leaks or significant water damage, investing in a new roof can save you from recurring repair costs.
Expert advice suggests that if your RV is over 10 years old or if the damage covers more than 25% of the roof’s surface area, it may be best to consider replacing rather than resealing. If you plan on keeping your RV for an extended period, investing in a new roof ensures its longevity and resale value.
Is the Cost to Reseal an RV Roof Worth It?
One important aspect that often gets overlooked is the condition of the roof. While it may seem like a minor detail, neglecting to reseal your RV roof can lead to costly repairs down the line.
A roof leak can not only ruin the roof an an RV, but it can have so many other affected areas, too. And this isn’t a quick fix. The amount of damage can be astronomical.
Importance of considering long-term savings versus upfront costs
While resealing an RV roof may involve some upfront costs, it is crucial to consider the long-term savings that come with proper maintenance.
A well-sealed roof acts as a protective barrier against water damage, which can be particularly detrimental to an RV.
By investing in resealing now, you can prevent more significant issues in the future that would require expensive repairs or even a complete roof replacement.
Benefits derived from a properly sealed roof in terms of preventing damage
Resealing your RV roof offers numerous benefits. A properly sealed roof keeps water out, reducing the risk of leaks and water seeping into your vehicle’s interior. This prevents potential structural damage and mold growth, ensuring that your RV remains in top condition for years to come.
A well-sealed roof acts as insulation against extreme temperatures. It helps maintain comfortable indoor temperatures during hot summers and protects against heat loss during colder months.
This not only enhances your overall camping experience but also reduces energy consumption by easing the strain on heating and cooling systems.
Impact on resale value and marketability of an RV with a well-maintained roof
When selling an RV, its overall condition plays a significant role in determining its resale value and marketability. Prospective buyers are likely to inspect every aspect of the vehicle before making a purchase decision.
A well-maintained roof demonstrates that you have taken care of your RV and signals to potential buyers that they can expect fewer issues in the future.
A properly sealed roof adds value to your RV by giving it a polished and well-cared-for appearance. It instills confidence in buyers, making them more willing to pay a higher price for a vehicle with minimal maintenance requirements.
By resealing your RV roof, you are not only protecting your investment but also increasing its market appeal.
Testimonials from RV owners who have experienced cost savings due to resealing
Countless RV owners have attested to the cost savings they have experienced as a result of resealing their roofs. By investing in regular maintenance and resealing, these owners have avoided costly repairs caused by water damage or structural issues. They highlight the peace of mind that comes with knowing their RV is protected against leaks and potential mold growth.
One owner shared how an inexpensive resealing job prevented extensive water damage during heavy rainfall, saving them thousands of dollars in repair costs.
RV Roof Sealant 101
In conclusion, choosing the right sealant for your RV roof is essential to ensure its longevity and protect it from potential damages. Factors such as the size of your RV, the condition of the existing roof, and the type of sealant you choose can all affect the cost of resealing your RV roof.
When comparing the costs of DIY versus hiring a professional for RV roof resealing, it’s important to consider your level of expertise and available time. While DIY may seem more cost-effective initially, improper application or inadequate preparation can lead to costly repairs down the line.
Determining whether your RV roof needs resealing or coating depends on its current condition. Regular inspections and maintenance are crucial to identify any signs of wear or damage that require immediate attention. Neglecting these issues can result in more extensive repairs and higher costs in the future.
There are different types of RV roof sealants available, each with varying costs. It’s essential to explore these options and select a sealant that best suits your specific needs and budget. Paying attention to resealing joints and seams on an RV roof is vital as they are common areas where leaks can occur if not properly maintained.
Comparing the cost of RV roof resealing versus replacement is another important consideration. While resealing is generally less expensive than replacing an entire roof, there may be instances where extensive damage warrants a complete replacement. Evaluating the overall condition of your RV roof will help determine which option makes more financial sense for you.
Is the cost to reseal an RV roof worth it? Absolutely! Investing in regular maintenance, including resealing when necessary, helps extend the lifespan of your RV’s roof while preventing costly water damage repairs in the future.
Remember, proper care and maintenance are key to ensuring your RV stays in optimal condition for years to come. By choosing high-quality sealants, addressing any issues promptly, and following recommended maintenance guidelines, you can protect your investment and enjoy worry-free travels.

How often should I reseal my RV roof?
It is generally recommended to reseal your RV roof every 3-5 years or as needed. Regular inspections will help identify any signs of wear or damage that require immediate attention. This can also depend on the size of the roof as well as the roof type.
Can I use any type of sealant for my RV roof?
No, it’s important to choose a sealant specifically designed for RV roofs. These sealants are formulated to withstand the unique challenges and conditions that recreational vehicles face.
Can I save money by doing the resealing myself?
While DIY resealing may seem cost-effective initially, it’s crucial to have the necessary skills and knowledge to ensure proper application. Improperly sealed roofs can lead to leaks and costly repairs in the long run.
What are the common signs that my RV roof needs resealing?
Common signs include water stains on the ceiling, visible cracks or gaps in the sealant, mold or mildew growth, and an overall aged appearance of the roof surface. A small leak on the roof an an RV means that there is already a problem occurring.
Are there any specific maintenance tips for prolonging the lifespan of my RV roof?
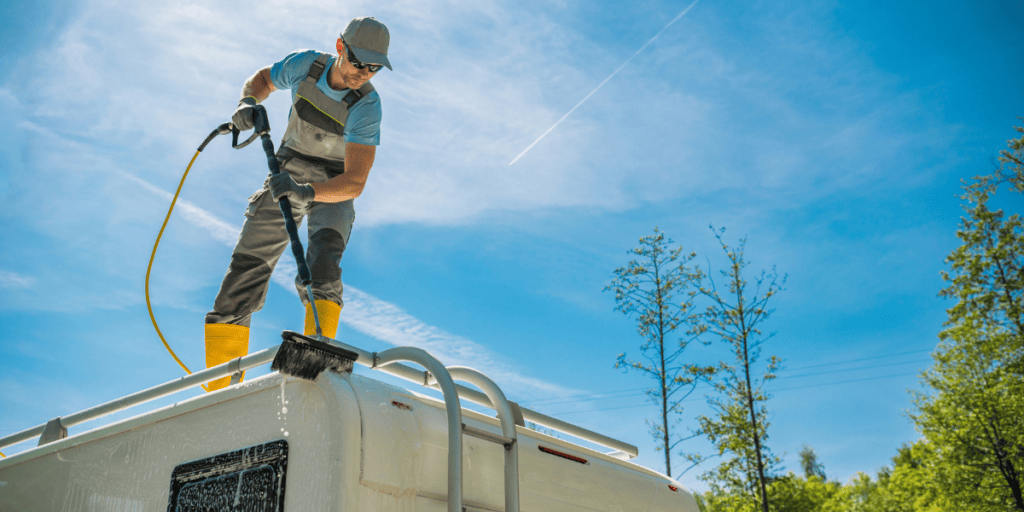
Yes! Regularly clean your RV roof with mild soap and water, avoid using harsh chemicals or abrasive materials, inspect seams and joints regularly for any signs of wear, and promptly address any issues to prevent further damage.
A good rule of thumb is that you want to keep the travel trailer roof or the roof on an RV as clean as possible at all times.
Leave a Reply